Lo que vamos a lograr:

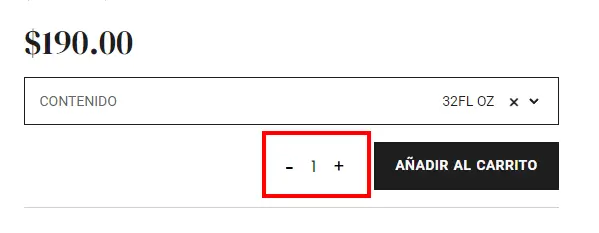
Vamos a agregar los botones de + y – a cada lado del input número tanto en el Detalle de Producto como en el Carrito de Compras:

Agregar botones al input numerico

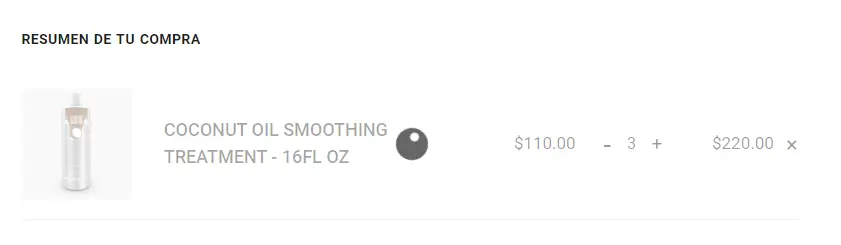
Y en el carrito de compras agregaremos la función para el update automático:


¿Cómo lo hacemos?

Para lograrlo vamos a agregar el siguiente script en nuestro custom.js (o la hoja de javascript que manejes en tu tema hijo):

La clase .pi-addCart es la clase que le ponemos al widget de Elementor en la plantilla de Detalle de Producto. Puedes reemplazar la clase con la que tú desees. 

				
					(function($) {
	$(document).ready(function() {

// **************************************************
// AÑADIR + Y - EN QUANTITY
// **************************************************

	if ($('.pi-addCart').length || $('.shop_table').length) {
		attachQtyButtons();
		if ($('.shop_table').length) {
			$(document.body).on("updated_cart_totals", function () {
				attachQtyButtons();
			});
		}
	}

	let updateCartTimeout;

	function attachQtyButtons() {
		const inputs = document.querySelectorAll(".input-text.qty");

		inputs.forEach((input) => {
			const decrementButton = document.createElement("button");
			decrementButton.textContent = "-";
			decrementButton.classList.add("decrement-button");

			const incrementButton = document.createElement("button");
			incrementButton.textContent = "+";
			incrementButton.classList.add("increment-button");

			input.insertAdjacentElement("beforebegin", decrementButton);
			input.insertAdjacentElement("afterend", incrementButton);

			decrementButton.addEventListener("click", function (e) {
				e.preventDefault();

				if (e.pointerType === "mouse" && input.value > input.min) {
					input.value = parseInt(input.value) - 1;
					$(input).change();
					updateCartAfterDelay(e);
				}
			});

			incrementButton.addEventListener("click", function (e) {
				e.preventDefault();
				if (input.max != ' ' || parseInt(input.value) < parseInt(input.max)) {
					input.value = parseInt(input.value) + 1;
					$(input).change();
					updateCartAfterDelay(e);
				}
			});
		});

		function updateCartAfterDelay(e) {
			if (updateCartTimeout) {
				clearTimeout(updateCartTimeout);
			}

			updateCartTimeout = setTimeout(() => {
				updateCartProducts(e);
			}, 1000); // Espera 1 segundo antes de ejecutar la actualización del carrito
		}
	}

	function updateCartProducts(e) {
		let cartForm = $('form.woocommerce-cart-form');

		if ($(cartForm).length) {
			$('[name="update_cart"]').click();
			e.preventDefault();
		}
	}
	
		}); //Cerrar function
})(jQuery); //Cerrar jquery


Ahora, vamos a agregar algunos estilos sencillos:

				
					/* ***************************************** */
/* BOTONES DE CANTIDAD */
/* ***************************************** */

.quantity input.qty{
    border: none !important;
}
.quantity{
	display: flex;
	gap: 0px;
	padding-right: 20px;
	align-items: center;
}
.quantity input{
	display: block !important;
	text-align: center !important;
	width: 40px !important;
	height: 10px !important;
	padding: 0px !important;
	font-size: 16px !important;
	background: red;
	pointer-events: none !important;
}
.quantity button{
	color: #000 !important;
	background: transparent !important;
	border: none !important;
	min-width: auto !important;
	width: auto !important;
	padding: 0px !important;
	margin: 0px !important;
	font-family: var(--e-global-typography-0c26c95-font-family), Sans-serif  !important;
	font-size: 28px !important;
	font-weight: normal !important;
	text-align: center !important;
}
.quantity button.increment-button{
	font-size: 19px !important;
}
.quantity input[type=number]::-webkit-inner-spin-button, 
.quantity input[type=number]::-webkit-outer-spin-button { 
	-webkit-appearance: none; 
	margin: 0; 
}
.quantity input[type=number] { 
    -moz-appearance:textfield;
}


Listo! con eso estamos.